- Written by NZ Fly Boy
- On Oct 17 2013,
- In Kawanishi H6K5 Mavis
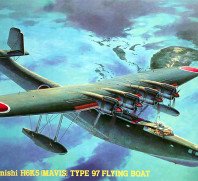
Hasegawa 1:72 Kawanishi H6K5 Mavis
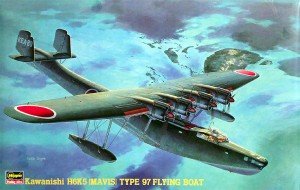 It would now seem that there are more votes for the Hasegawa kit than the Airfix Sunderland. So in the spirit of it all I’ve thought it best to do the two of them! As well as put up another poll! So here it is the initial review of the kit and it’s contents.
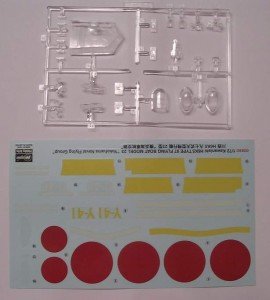
The decals appear to be vaguely usable but hard to tell as they are still (yes that’s STILL) in the bag they were put into at the factory! This is going to be a big kit when built even for 1-72nd scale!
Construction will start as it always does with the cockpit, and the decision as to what to add and how much! The detail in there is rudimentary at best. I’ve had a look for a detail set (My A.M.S. is getting worse I fear) but as usual there aren’t any currently on the market. There may have been one long ago when the kit was first produced but that was many years ago and a search of eBay has revealed very little. So it’s a matter of gathering my resources and building as much detail as I want to; which, depending on my mood, can vary. I’ve spent some time looking for an aftermarket detail set but the only one produced is long out of production. So I’m gathering my reference material and seeing what detail to add.
I will likely fill the radio and navigators compartments with some scratch built details. For the waist and tail gunners positions I will add just a little more detail so something can be seen! Finding free references is difficult but I’m holding out hope I can find some on the web.
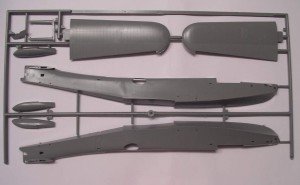
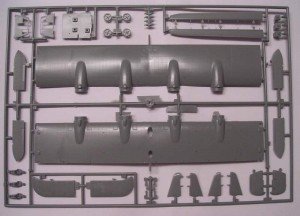 The kit is well constructed with raised details and reasonable rivet detail as this is a very old Hasegawa kit from the early eighties. (This release anyway!) Like most Hasegawa kits the moulding is sharp and precise with minimal flash and should build easily and rapidly.
This is going to be a fun and interesting build with plenty of challenge in the construction and scratch building of interior details.
For instance the cockpit floor wasn’t all one level there was a lowered section/walkway through the centre of it so the floor has to be scribed and cut and the channel built in.
What resources I’ve managed to find give me some very nice pictures of the outside of the plane but nothing of it’s interior but I’ll copy the interior of the later H8K as they were both built by the same company so the layout will no doubt be similar.
I’ll see if I can find some PE seat harnesses, if not, I’ll make an attempt at my first masking or lead foil ones! Keep watching here for updates and details about the build!
Cheers and happy modelling
NzFlyBoy


by NZ Fly Boy
Avid WW2 aviation enthusiast and modeller. Been making model kits since age nine and I now model mostly ww2 model airplanes. (my wife is an understanding one!)
Categories
- Airfix Model Airplane Kits
- Airplane History & Use
- Build Reviews
- Dragon Master Kit 1-48 Fw1908A-8
- Featured
- Hasegawa Model Airplane Kits
- Heller Model Airplane Kits
- ICM Model Airplane Kits
- Italeri Model Airplane Kits
- Kiwi Wings Model Airplane Kits
- Model Kit Tips & Techniques
- Revell Model Airplane Kits
- Signifer Model Airplanes
- WW2 Model Airplane Kits
Recent Posts
-

Welcome to WW2 Model Airplane Kits
Mar, 15, 2009
-
Dragon Master Kit 1-48 Fw190A-8 with Owl Res...
Jan, 12, 2017
-
Revell-Matchbox 1:32 Sea Venom Vampire NF: C...
Dec, 31, 2016
-
Revell-Matchbox 1:32 Sea Venom Vampire NF: F...
Dec, 31, 2016
-
Revell-Matchbox 1:32 Sea Venom Vampire NF Fu...
Dec, 31, 2016
-
Revell-Matchbox 1:32 Sea Venom Vampire NF Bu...
Dec, 31, 2016
-
Kiwi Wings 1/48 CA-12 Boomerang
Feb, 14, 2015
-

Heller Kits – Aren’t They All Ai...
Dec, 12, 2013
-
Hasegawa 1:72 Kawanishi H6K5 Mavis Progress
Nov, 26, 2013
-
Hasegawa Kawanishi H6K5 is a BIG kit!
Nov, 06, 2013
-
Hasegawa 1:72 Kawanishi H6K5 Mavis
Oct, 17, 2013


Leave a Comment