
Airfix 1:24 FW 190 A-5: Painting the FW 190
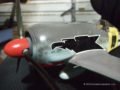
Just a quick word about the undercarriage doors before you begin to paint – they needed some filing work done on the to get them to sit in the right place as the added interior detail interfered with them. It didn’t take much but I thought it a good idea to warn you to take this into account when you’re building your Airfix 1:24 FW 190 A-5. So after spreading quite a small amount of putty around, it’s off to the paint shop!
Priming & Pre-shading
I have never used any undercoat/primer on the models I’ve built. Just plain lazy perhaps – but I’ve found that up to this point I’ve never needed to use it. For this model I have decided to forgo pre-shading and concentrate on post shading with a modicum of dot filtering.
Applying the Top Coats


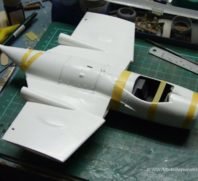
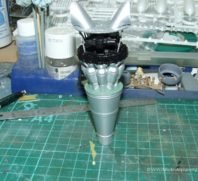
I’ve applied the first coats of RLM 78 Himmelblau to the undersides and undercarriage doors. Next it’ll be coats of RLM 74 Graugran and RLM 75 Grauviolet.
After the first coats of paint there’ll be the odd bit of puttying and sanding to get a panel to look right and to smooth out any joints in the kit. The seams have turned out quite well and the general fit of panels has been excellent for the most part, however careful work around the engine cowling is required!
Again, if you work methodically and carefully, allowing every major step a chance to dry properly, this kit can very easily be put together. I reworked the mottle as I was unhappy with it and I feel it looks better now. (I’ve put up a couple of pics of the finished paintwork below. )
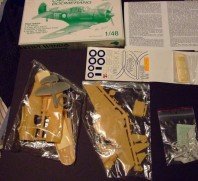
AFXFW57 Focke-Wulf FW190 A-5

I’ve got the undercarriage doors attached, the tail wheel in place and now it’s just a simple matter of fixing the canopy and getting it in place then the FUN part starts! Painting the markings using Mal’s “miracle” masks! Actually it’s just Mals masks but I thought it sounded better with the word miracle in the title as I’ve seen the results from these masks and they’re nothing short of amazing!
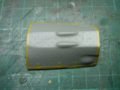
A little further along now most of the construction phase is over, just the inboard canon covers to go on. I’ve fitted the undercarriage doors which gave me a little trouble as the wheel well detail I’ve added has changed the original dimensions. The edges of the covers where it slides into the wheel well had to be filed to get it to fit, not by much and it certainly wont be seen. It slotted together nicely with the landing gear and set up at the correct angle it just required being held in place with a spring clip till it had dried.
I’m almost done painting only the inboard canon covers and pitot tube left to do. So here it is the progress so far, I’m happy for the most part with it, I hope you’ve had as much fun watching this as I’ve had getting it to this point. Remember that all of the pictures from this build log can be viewed in a larger size in the gallery of the same name on this website.
Related Posts


Categories
- Airfix Model Airplane Kits
- Airplane History & Use
- Build Reviews
- Dragon Master Kit 1-48 Fw1908A-8
- Featured
- Hasegawa Model Airplane Kits
- Heller Model Airplane Kits
- ICM Model Airplane Kits
- Italeri Model Airplane Kits
- Kiwi Wings Model Airplane Kits
- Model Kit Tips & Techniques
- Revell Model Airplane Kits
- Signifer Model Airplanes
- WW2 Model Airplane Kits


Leave a Comment